Thursday 8 September 2011

What's up next...

I'm in a bit of a lull for projects currently - there's lots of pieces I want to make, but no fabric in the stash, and no tracing has been done.  So I spent all of last Sunday kneeling on the lounge room floor tracing from various BurdaStyle magazines in a bid to progress.  But boy did my knees ache when I finished!  Mental note to self - next time use the table!

First up will be the 'boat ride' top, 105 from BurdaStyle 07/2011.  I want to make this top in some really lux fabric, so I've made a muslin to trial size and test making the drape.  Well okay yes, basically I just wanted to sew and this was the only fabric I had!  Fit seems pretty good; I just need to shorten the bust darts and lengthen the top a fraction.


After this I'll be making up 'Pure Power' dress 104 from 05/2011 BurdaStyle.  I want to use some sort of more formal type fabric so I can wear it to work, but I think this pattern could also go well in a casual cotton.
104_techdwg_large

I won't get ahead of myself though, I think these 2 will keep me going for a while at my snail pace of sewing!

Monday 29 August 2011

Anne Klein dress V1222

Just finished this Vogue Anne Klein design from the Spring 2011 collection.


It's wasn't complicated to make, but there are over 20 pieces to it and a LOT of top stitching, so it was very time consuming.


I took the shoulders up by an inch or so as the bust detail sat below where it should have been.  See the left picture before the adjustment, and the right picture after it.


pic name

pic name

In hindsight, I should have done a proper shoulder adjustment and taken out excess fabric around the armholes, rather than just bringing up the shoulder seams, as there is a bit of fabric bunching going on when it's worn.  I might fix this one day, but for now the dress is definitely still wearable.

Here's the side paneling detail:


See what I mean about a LOT of top stitching!

Thursday 25 August 2011

BurdaStyle 08/2011

I only just received my August Burda Style magazine, but better late than never I guess.  For me this is probably the best issue since the very first one I purchased.  There's heaps of items I'd make in it.  But as I often find with Burda Style, I love the fabric they use, but can never find it for sale, which is really frustrating!  Like this knit cardigan - it's my favorite piece in the issue, but do you think I can find anyone online who sells knits?  Even Alfatex does not have this fabric against the picture.  Sigh.


Do others have this same problem, or have any suggestions on where to buy from would be great....

Sunday 17 July 2011

Back into it, with a skirt and shirt

Well, its been a while, I know!  After so much sewing over the autumn and winter, I took a bit of a break to make the most of the brighter weather, and to spend time on other things.  Now that I'm getting back into sewing, I've decided to focus this year on making work wear garments to build up this part of my wardrobe, and to try and co-ordinate the pieces as much as possible.

I've started with a skirt and 2 tops, from the fabrics I bought back in Oz in March.  It's like the finished items will be a belated holiday souvenir! 

The skirt I've made before, Butterick B5249, however this time I made view A, a simple straight skirt.  I'd recommend this pattern to you all, it's quite versatile, and the different views mean it can be made over and over again.

The first top to go with this skirt is a shirt in New Look 6407.  I'm making view D.  The fabric is a silk poly and was a complete nightmare to cut out; real slippery.  I had to cut each piece from single layer, it took absolute ages to do as it kept moving about.  Luckily though, sewing the fabric was pain free.  I did french seams on all except the armholes, which I over locked due to the curve.  To set in the sleeves I used my usual process of spreading the ease manually with pins rather than by gathering.  And I decided not to go for a bow and cut-out on the sleeve, but to instead just have a band which I decorated with an overlap and button.  The sizing on this pattern came up small - I cut a 12 which fit my measurements, but I really could have done a 14.  This picture doesn't have the hem and buttons sewn on yet, but you still get the idea!


The 2nd top will be a self drafted pattern and is still in progress, so I'll save that for a later post.

Saturday 26 March 2011

BurdaStyle 01/2011 102 Blouse

I'm in love with this blouse!  But it was a hard slog!  I took a lot of advice from long time sewer of BurdaStyle, Sharon, who wrote a few great blogs on the fun-and-games she had making it, and I'm sure this advice was the reason mine turned out so well - thanks Sharon! :)

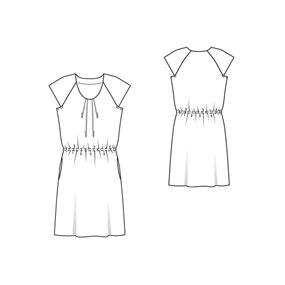
Here's the technical drawing:
And now my version (paired with my BurdaStyle 113 skirt):


5249 cover

5249 view B

I made Sharon's suggested construction alterations, and also made a few extras of my own.  They were:

* Omitted the button loops and replaced with normal button holes (mental note to self - practice stitching buttonholes before next project!).

* Removed 5/8" from each CF piece as such an overlap wasn't necessary due to the button change above.  However, I probably should also have increased the slope of the neck V as it's quite a conservative height now (a little too conservative perhaps...)

* Changed the front dart to a peplum and added 5/8" to the length to compensate.

* Brought the front top gathers closer to the CF.

There were a lot of difficult parts in the construction of this top - the square set sleeves, the yoke and the buttonholes - the first two were difficult because the instructions were absolute rubbish, the later was difficult because I was rubbish at it!

Now I'm certainly no pattern instruction writer, but hopefully these construction tips below will be more helpful than the BurdaStyle ones!:

For the sleeves - finish vertical stitch line 5/8" below the corner.  Clip the front or back piece (not the sleeve piece) from corner to end of stitch line.   When doing the horizontal seam, pull the fabric to the side, and ensure your stitch lines meet in a perfect right angle, otherwise you'll get an unfortunate pinch in the fabric at the corner of the sleeve.

For the front facing - cut a little longer than the front piece at the top so it's easier to finish.

For the yoke - when joining to the blouse, ensure the front neck edge of the yoke extends 5/8" past front/facing seam so that when the bottom yoke is sewn on the finished edges all meet.

Did I mention that I love it?!

Sunday 6 March 2011

6848 holiday pic

I can feel the onset of post holiday blues already!  Snapped this pic of me wearing the 6848 whilst in a winery in Perth - it was pretty hot this day so excuse the dodgy hat! 


And of course I went fabric shopping and picked up some nice co-ordinating fabrics for some more projects - once I've done everything else on my list first, promise!  

Tuesday 15 February 2011

Simplicity 6848 - Summer holiday dress!

This will be my last post for a few weeks as I'm off on a holiday - yippee, SUN here I come! :)  To celebrate the excitement, I finished off this little summer dress, Simplicity 6848.


I made view C in a cotton fabric which I purchased from Mood whilst on holiday in New York some time ago.  I've taken the pictures on my dress form as there was no way I was getting dressed for a summer day whilst here in the chilly UK!  I'll try take a pic of me in it whilst on holiday and post for you all to see.

A close up of the bodice which has a bit of gathering:


I'd probably recommend that if you're a bit hippy, that you cut a more prominent A-line than the pattern piece.  It currently just fits over my hips and I'd probably would have liked a bit more room.  Even so this is a simple quick dress to sew.

Saturday 12 February 2011

Burda 7576 Jacket - Setting in the sleeves

I've always had difficulty setting in sleeves.  They always seem to look a little unprofessional, a bit too rustic.  So obviously I was a little nervous when I got around to doing them for the 7576 jacket.  My main problem has always been there's a pucker, or a gather that's not evenly distributed, no matter how hard I try.  This is the sleeve of the McCalls M5759 jacket I made, notice the problem?


I was told recently of another method to set sleeves in which is different to how pattern instructions and all my books said to do it, and I decided to give it a go for this jacket.  I'm thinking the results are pretty good....

Do not sew the 2 gather lines as per pattern instructions.  Instead, it's all about pinning to distribute all the ease evenly.   First match up all markings and pin together - I had 4 markings for this jacket making 4 little sections.  Next, working on one section at a time, find the middle of each fabric piece and pin mark it, then match the 2 pins together and pin the sleeve to jacket.  Then do the same again and again until all ease is distributed.  Then move onto the next section until all are done.  Your pins should be close together, about 1/8 inch apart in areas with a lot of ease.  This is what it'll look like once pinned:


You can then hand baste it all together and take out your pins, or like me whose hand basting isn't good enough, just sew the sleeve with all the pins in - obviously sewing really slowly so you can whip them out if the needle looks like it's going to hit.  This is my sewn sleeve - I'm thinking is the cleanest one I've done, big smile!  Compare it to the M5759 one above.

This will definately be my method from now on.

Sunday 6 February 2011

BurdaStyle 01/2011 - 113 Skirt

My first Burdastyle magazine pattern is completed!  Overall I'm pretty happy with this skirt, although I had a few little issues with the construction. 


2440 front


2440

2440 front

2440

The fabric I used came from a sample rack so I'm not entirely sure of its contents, however I think it must be lycra based as it has a bit of stretch - this is a good thing as this skirt is quite close fitting! 

The yokes:  Getting a nice clean V shape on the yokes was difficult and I didn't quite get there unfortunately!  You can see from the picture that the back V dose not sit so flush. 

The godet:  I loved this element of the skirt in the magazine picture, but unfortunately this part just did not quite work on mine.  I think this was because of 2 factors -
  • I had taken 2 inches off the length when cutting out to get it to my desired length, however I forgot to adjust the the godet seam mark on the pattern up by 2 inches also.   This meant that my godet was far too small;
  • The fabric doesn't have enough movement in it so the godet stuck out rather than fall softly into a fold.  Looks more than a little odd so off it came!

The tailored jacket is still in progress and coming along slowly, I should have a post soon as an update.

Saturday 29 January 2011

Burda 7576 - Jacket, Uppercollar

Not much happening in my sewing world this week unfortunately, I've only managed to work on joining the uppercollar to the front facing.  Why is it that instruction writers always seem to go light on words in the really tricky areas of the construction?  Is it because for them it's an easy step, or, perhaps they're just as confused and keep it brief so they don't get found out!  Anyhow, it was tricky and fiddly getting a nice neat corner on the join - it was a 3rd time lucky situation!

Burda 7576

Burda 7576

Burda 7576

Feels like progress has been slow after such a good start, but I know that once the collar is done, the rest should come together quite quickly....